Lightroom is a great tool for photographers to handle editing, organizing, and improving photos. Its easy-to-use interface gives beginners the ability to edit many photos at once, while keeping the original files safe. Unlike Photoshop, which is better for detailed image work, Lightroom focuses on quick management and batch edits. I tried Lightroom Mod APK, and while I prefer the original, the Mod version also shows its value. You can enjoy the process without harming the original photo, making it perfect for anyone new. Lightroom is made at its core for smart, fast editing, and I still use it often to improve my images and keep them organized.
Adobe Lightroom is a strong tool for photographers at any skill level. If you’re new, this guide will show you the key steps to learn the basics, organize, edit, and improve your photos more easily. Lightroom supports a smooth workflow, helping you work better and faster.
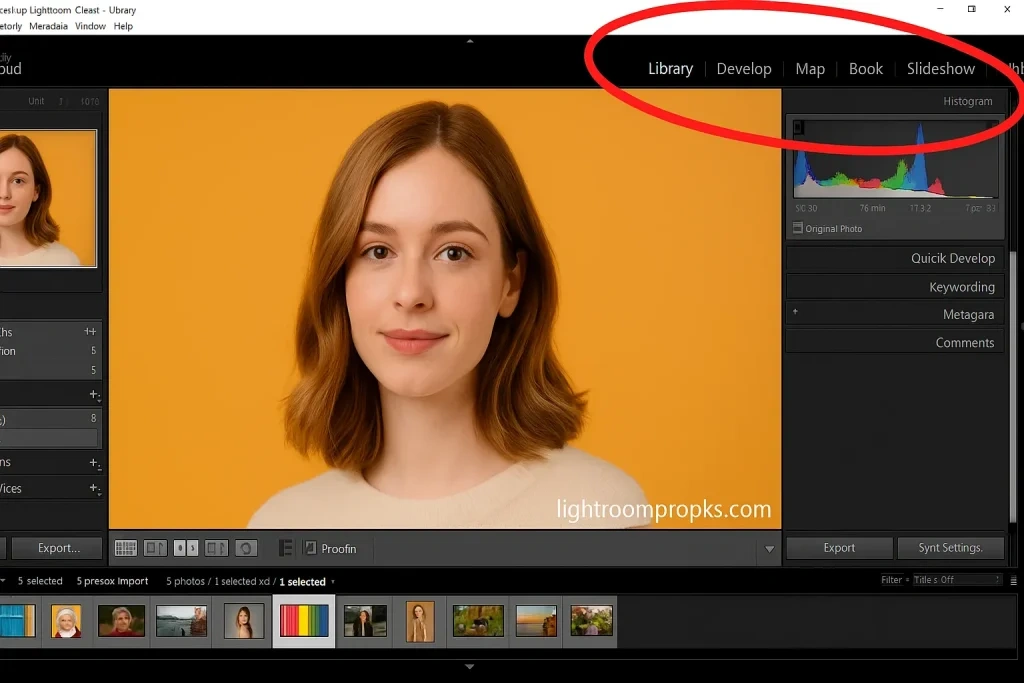
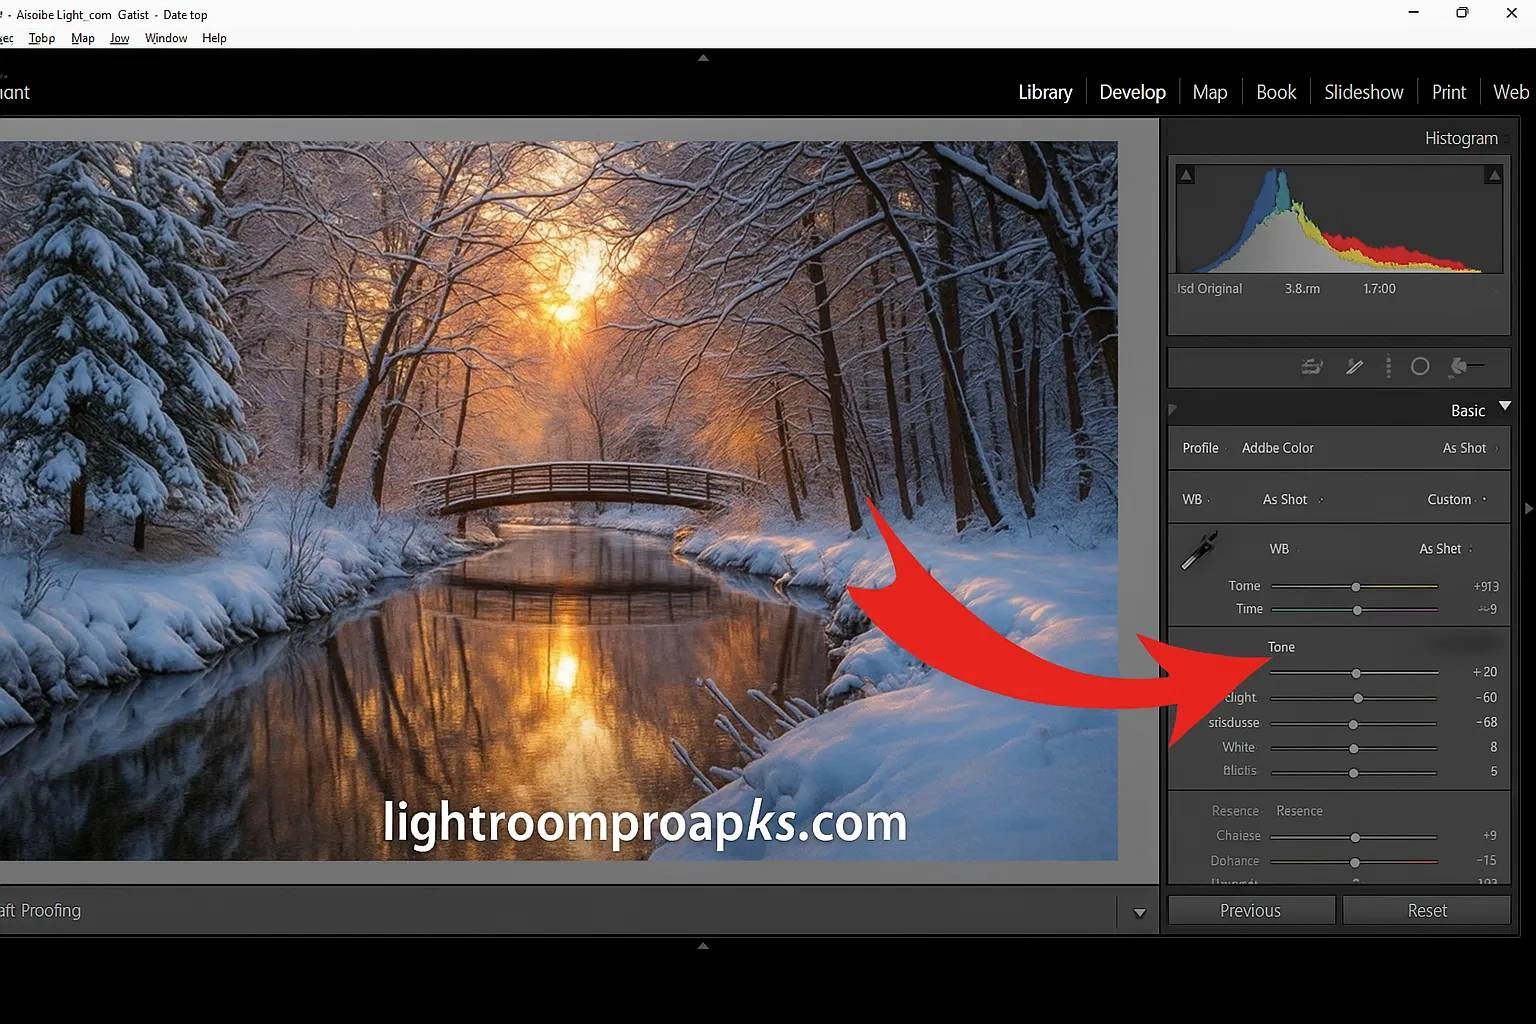
Understanding the Lightroom Interface
When you first open Lightroom, the interface might seem confusing, but it becomes easier as you get used to it.
Lightroom is powerful editing software designed for photo and video work.
The layout is organized into several sections to help manage your editing flow smoothly
The layout is organized into several sections to help manage your editing flow smoothly
The layout is organized into several sections to help manage your editing flow smoothly
In the Develop Module, most of the actual editing happens, such as adjusting brightness and colors.
You’ll also find extra modules like Map, Book, Slideshow, Print, and Web Modules, each built for specific tasks.
These additional areas are great for creating books, sharing online, or preparing prints and printing layouts.
Tools such as panels, sliders, and toolbars help with making detailed changes to your photos.
Once you learn to navigate these tools, editing becomes much more easily done.
I tried using the Lightroom MOD APK version to download and test out a few bonus features before using the full version.
Whether you’re a beginner or experienced, take time to get to know Lightroom by diving into all the helpful tools it offers.
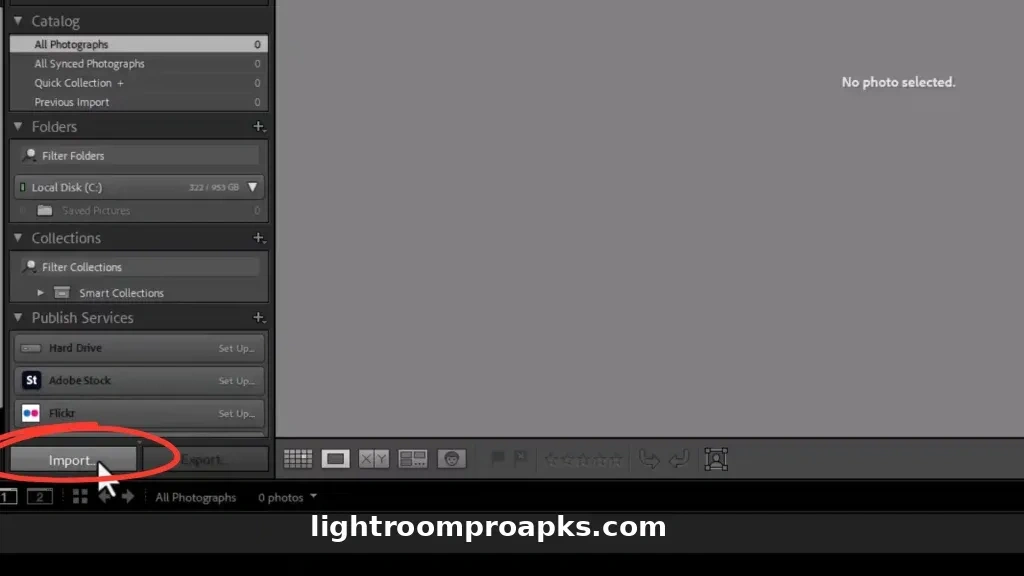
Importing Your Photos into Lightroom
To begin using Lightroom, the first thing I did was learn how to import my photos the right way.
I clicked on File in the menu, then selected Import Photos and Video to bring in my images.
You can choose your source, like a camera, SD card, or a folder on your computer.
Lightroom lets you Copy, Move, or Add the files, depending on where they are stored.
Before importing, I like to apply my favorite presets and basic metadata to save time during editing.
You can also select if you want to import videos along with your photos, which I often do
Once ready, just Click import and you’re set to start editing in the editing software.
I even tested Lightroom MOD APK once to download and explore more features before going with the official version.
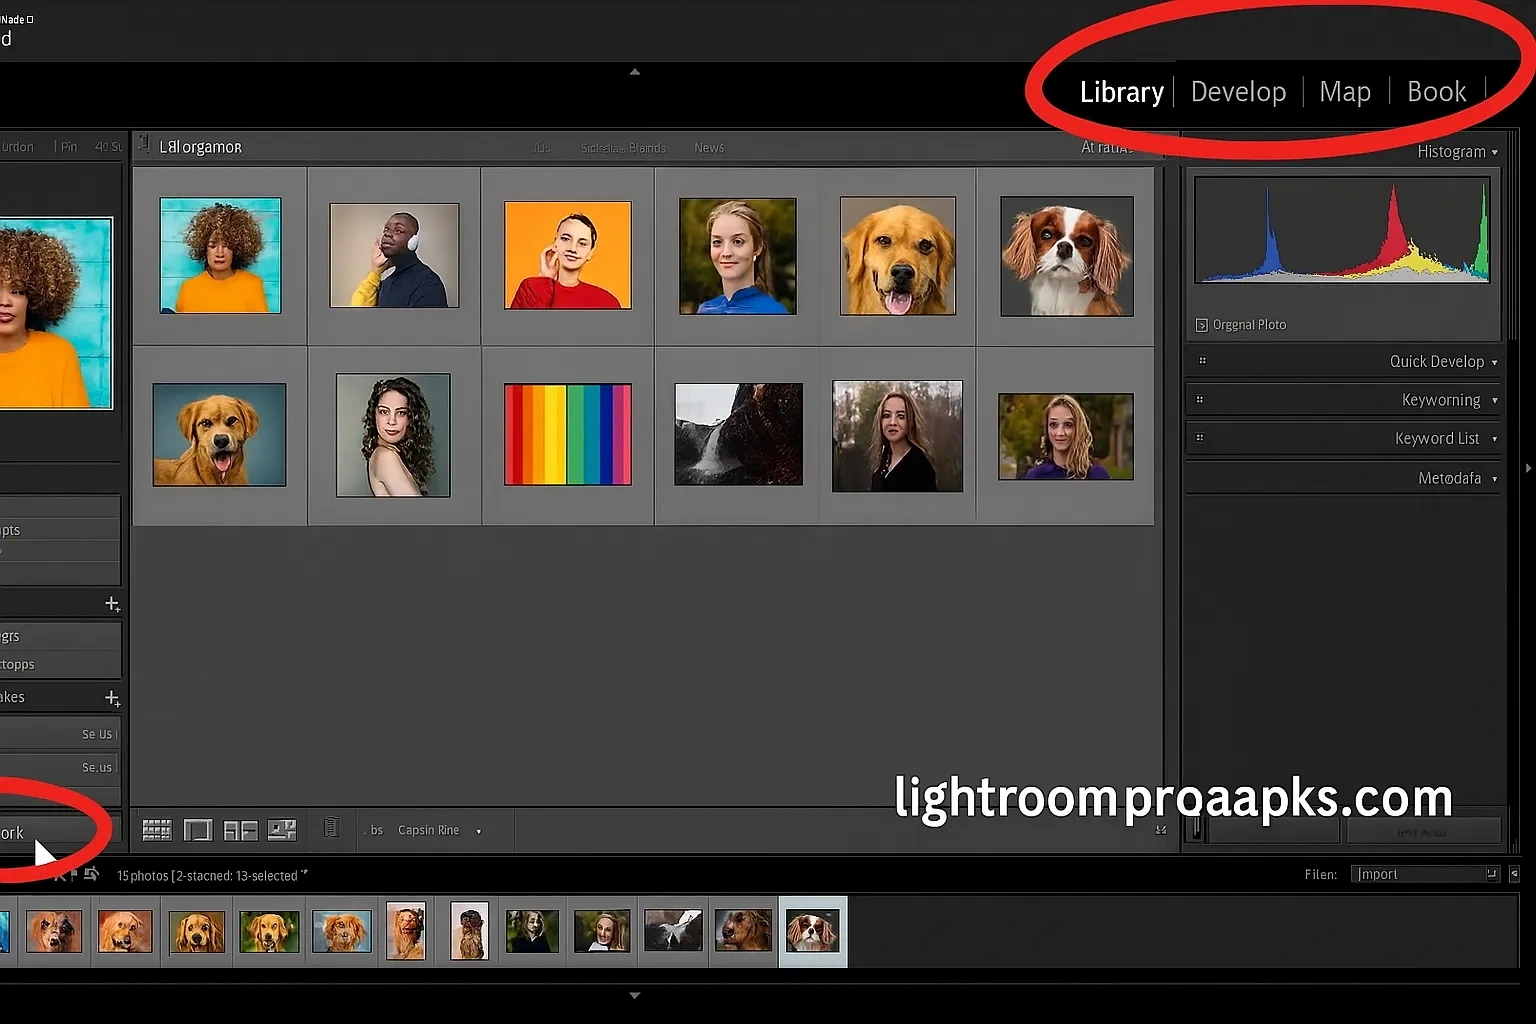
Organizing Your Photo Library Effectively
Keeping your photo library well-structured saves a lot of time, especially when managing many photos.
I use Collections to group similar shots, like placing all my portraits in a folder labeled Portraits 2025.
You can choose your source, like a camera, SD card, or a folder on your computer.
It helps to Apply Keywords and give Ratings to each image it makes searching later very easy.
I always Tag photos I plan to edit or export, so I don’t miss anything.
With Flagging, I can Mark my best shots as keepers using the P key and remove rejects by hitting X.
Color-coding also helps Color Labels make it faster to spot progress or status at a glance.
One of the most helpful tools I’ve found is Smart Collections, which Auto-group files using certain criteria like rating, date, or keywords.
These methods keep my entire system neat and help me stay focused when organizing things effectively.
Basic Editing Tools Explained
To Start, focus on the essential tools inside the Develop Module in Lightroom.
Begin with White Balance to correct the overall color tones in your photo.
Adjust Exposure and Contrast to fix brightness and bring out the depth in your image.
Use Highlights and Shadows to recover details in bright and dark areas
Enhance your colors naturally with both Vibrance and Saturation this keeps them rich but realistic.
Always Crop and Straighten to fix your photo’s composition small adjustments here can make a big difference.
These tools helped me improve my photos quickly, and they now feel like second nature.
Advanced Editing Techniques Lightroom for Beginners
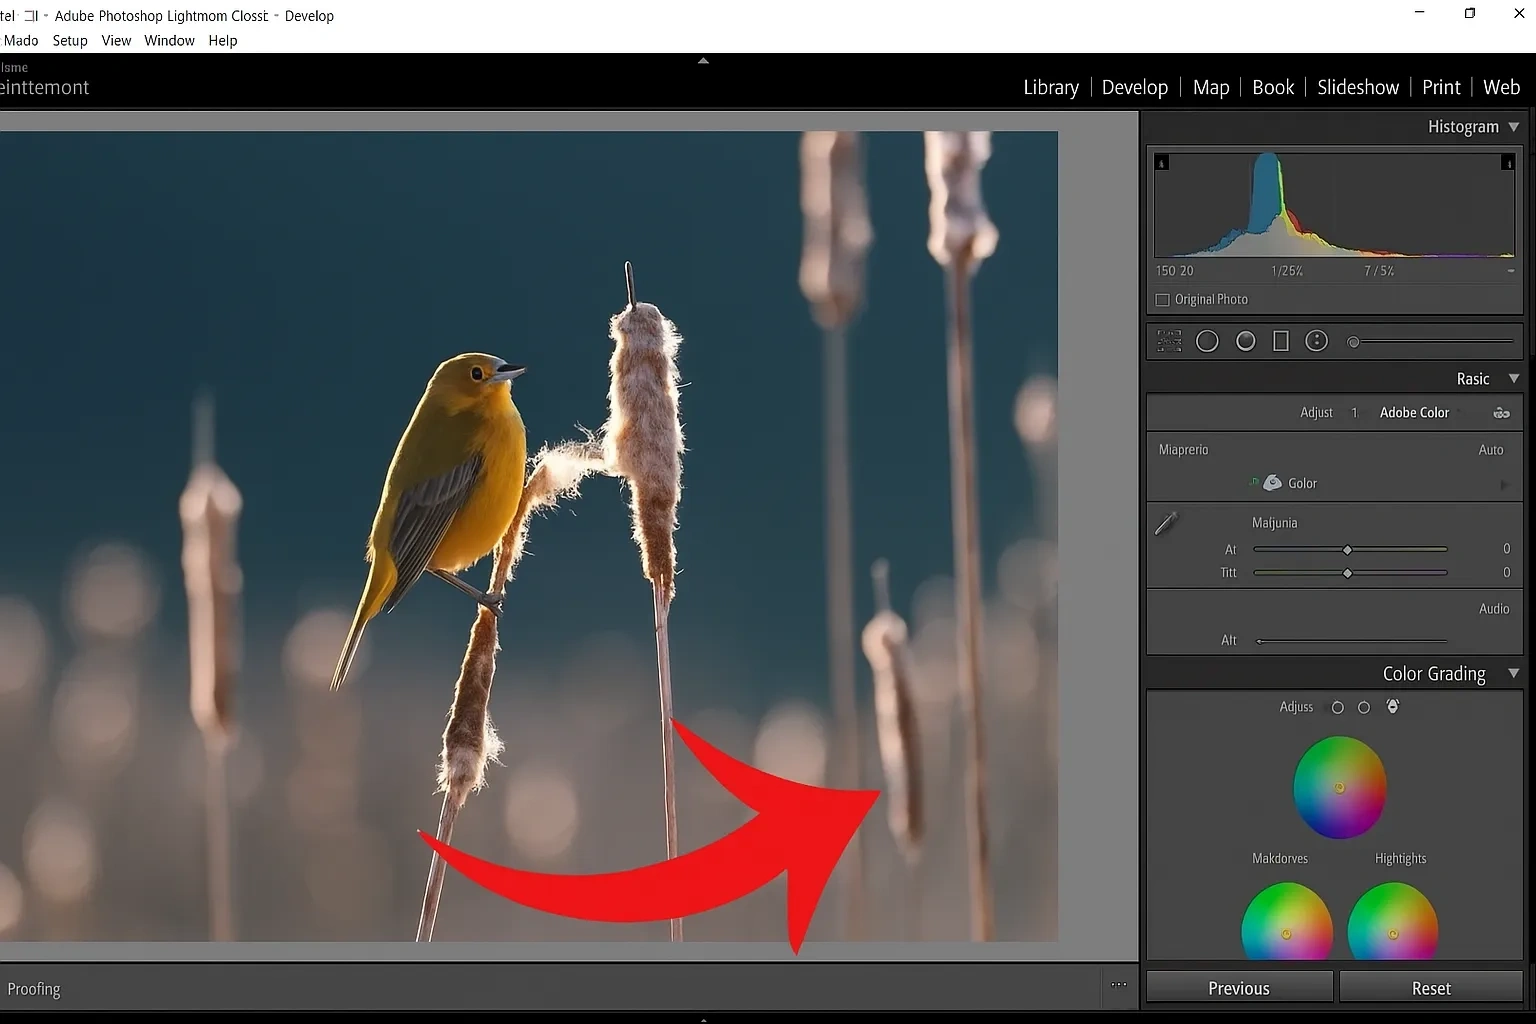
Once I felt comfortable with the basics, I decided to try more advanced tools in Lightroom.
I began using Graduated Filters and Radial Filters to apply selective adjustments to parts of my images.
These filters are perfect for targeting areas like skies or backgrounds without affecting the whole photo.
The Adjustment Brush lets me edit specific spots, like when I want to brighten someone’s eyes in a portrait.
I often use the Tone Curve to fine-tune contrast and strengthen the tones in my shots.
The HSL Sliders help me adjust individual colors for balance and mood.
If a photo has lens issues, I use Lens Corrections to fix distortions automatically and clean things up quickly
Exporting Your Finished Photos
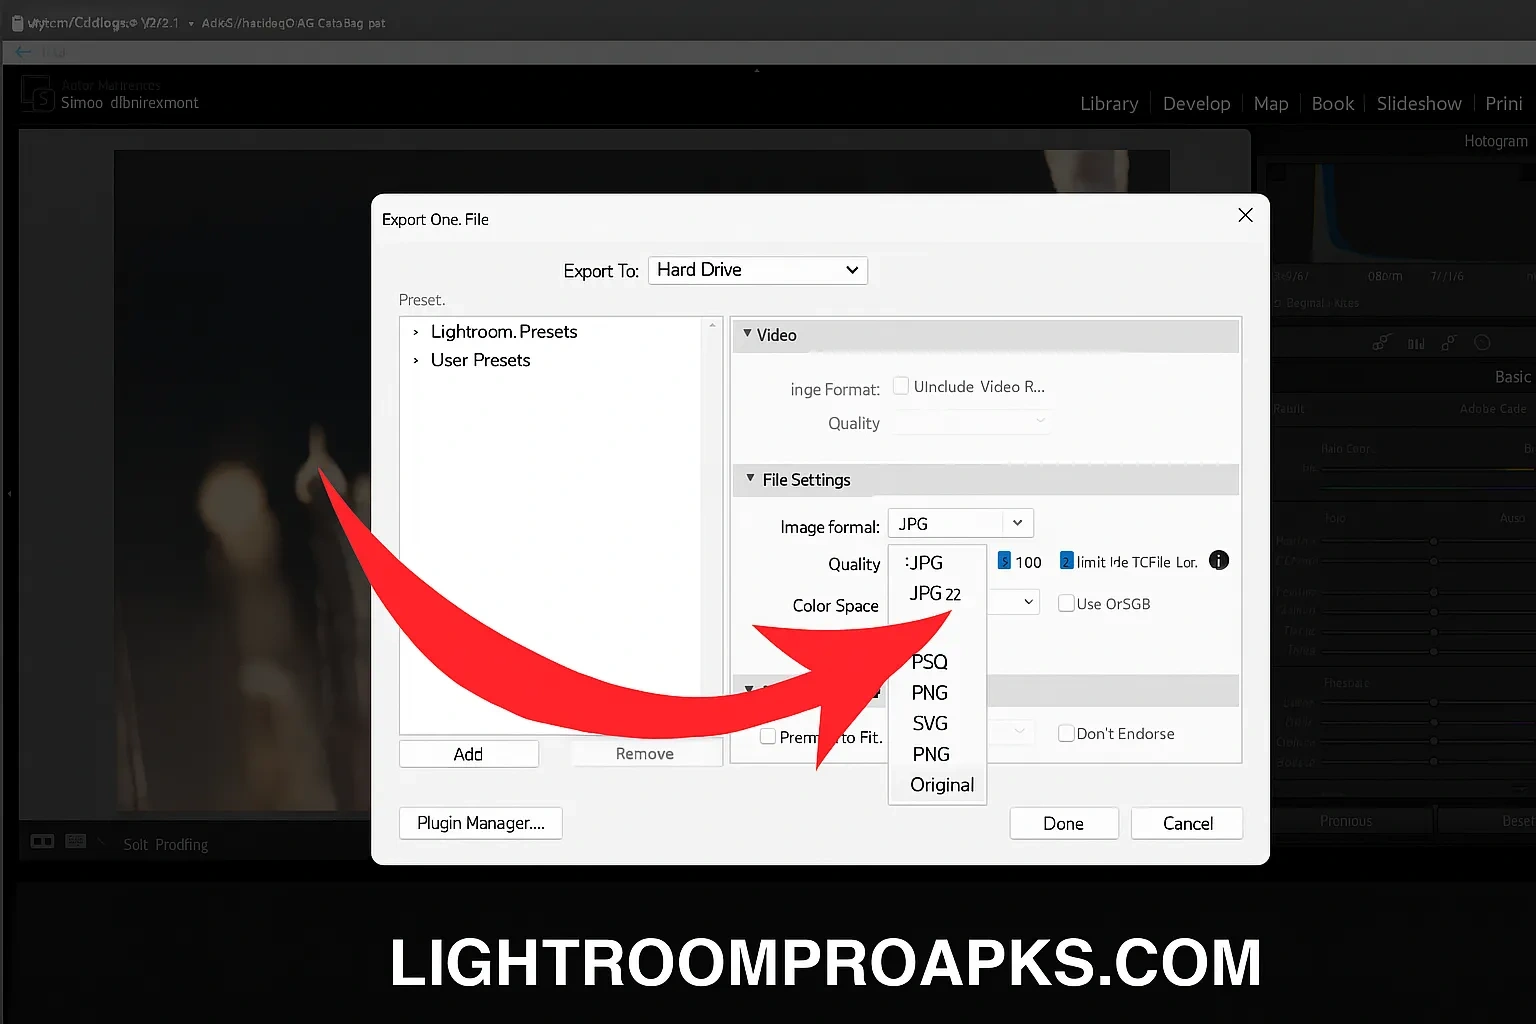
After editing is complete, it’s time to export your photos for sharing or saving.
Choose the file format use JPEG for web or online, and TIFF for printing.
Set the resolution based on use: 72 PPI for digital display, 300 PPI for print.
Choose the destination folder where your exported files will go.
Once done, click Export to finish the process and save your images properly.
Tips for Efficient Workflow in Lightroom
Use Free lightroom presets to speed up editing many great ones are available to Download.
These Presets allow for one-click edits, helping you Save a lot of time on repetitive tasks.
Learn Keyboard Shortcuts to improve your Speed for example:
Press D to jump to the Develop panel.
Press G to switch to Grid view.
Set the resolution based on use: 72 PPI for digital display, 300 PPI for print.
Use Sync Settings to Apply the same edits to multiple photos at once this saves hours during large projects.
Always Shoot in RAW format; it gives you greater flexibility when fine-tuning your images during editing.
Common Mistakes to Avoid in Lightroom
Avoid Overediting too many changes can ruin the natural feel of your photo. Keep adjustments natural
Don’t skip organizing your work. Skipping Organization can lead to chaos later.
Make it a habit to Tag and rate your photos early so they’re easy to find later.
One major error is Not Using Catalogs. You need catalogs to Manage large libraries efficiently.
Don’t make the mistake of Ignoring Backups Always back up your catalog to avoid losing your progress.
Mastering Lightroom as a Beginner
Adobe Lightroom is an easy-to-use tool that helps photographers edit, organize, and improve their images. As a beginner, I started with the interface and slowly began learning both basic and advanced editing techniques. I always keep the original files intact while I try different tools to enhance my photos.
To avoid common mistakes like over-editing or poor organization, I stay organized, practice daily, and stick to simple adjustments. My workflow is now much smoother, and I love using Lightroom for portraits, landscapes, and event shots.
The basics are easy, but my skills grew by trying new things. I enjoy the process and let my creativity flow. So if you’re starting today, start small, use the tools, and express your photography your way.
Dealing with blurry photos can be frustrating, especially when you thought you captured a great shot. I have had moments where my pictures didn’t turn out as expected, often due to a shaky camera, lack of focus, or incorrect shutter speed. These are common reasons that affect image clarity. Once I learned what was behind…
When I first experimented with Lightroom and Photoshop, I quickly realized how powerful they are for enhancing the colors and tones in an image. Over time, I discovered that color grading is an important skill in photography, especially for those who love capturing landscape and portrait shots. With the updated color grading tools, editing has…
There are many tools available for video editing today, but which one is the best tool among them with which you can edit videos? In this article, we will tell you which are the best video editing apps available in 2025. Whether you create reels, TikTok videos, YouTube videos, or prepare professional presentations, choosing the…
Choosing between Lightroom vs Darktable often comes down to individual requirements and preferences. Lightroom, developed by Adobe, is a paid editing software with advanced features and powerful tools that cater to professionals. On the other hand, Darktable, an open-source software, is a popular free alternative for those who want effective editing without a paid app…
If you’re looking for a way to cancel your Lightroom subscription and move to a subscription-free photo editor, you’ve come to the right place. Whether you’ve found other software or your new company doesn’t require Lightroom, this guide will help you. Having tested Adobe tools personally, I understand how overwhelming it can be to figure…
Adobe Lightroom is a famous photo editing software that provides photographers with powerful tools and simplified workflows. While most users are friendly with its basic qualities, many are unknowing of the hidden functionalities that can significantly improve their editing procedure. In this article, we’ll explore 10 hidden features of Lightroom 2025 that can make your…